
Software setup
Adding ESP32/ESP8266 Boards to Arduino IDE
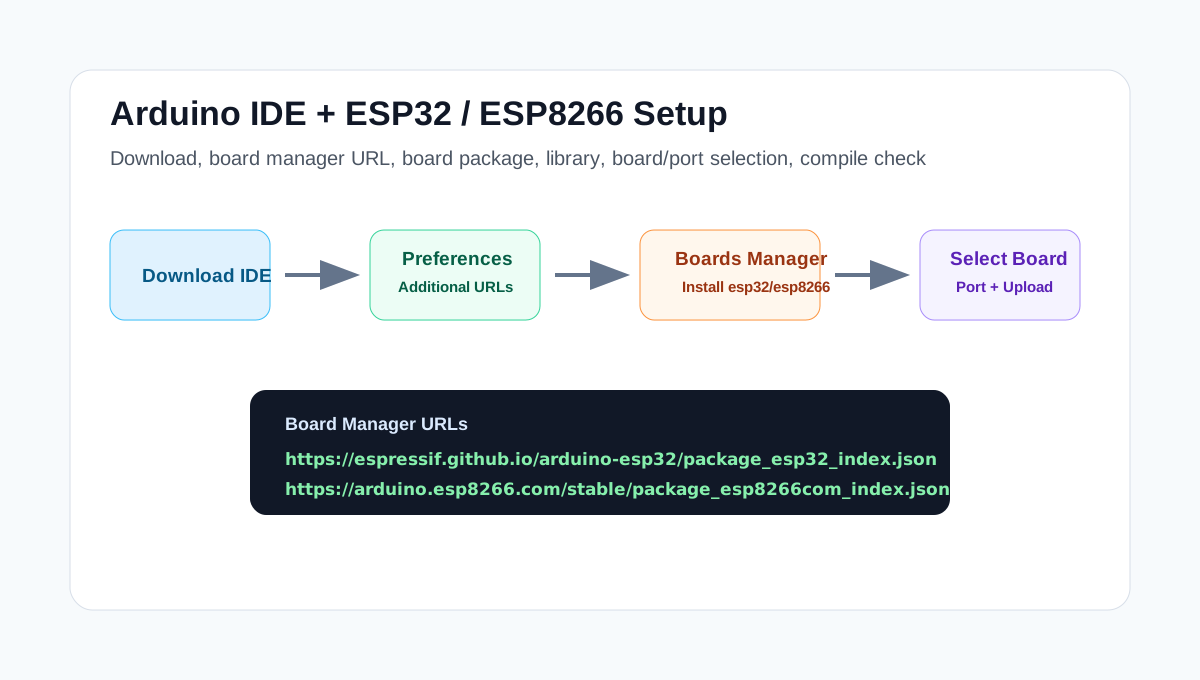
Installing Arduino IDE alone doesn't let you compile for an ESP32 or ESP8266 board. You need to add a boards manager URL, install the board package, and then confirm the required libraries and port. This guide walks first-time users through the whole process in order, from download to a confirmed compile.
Terminology used in the menus
This process is usually called boards manager setup or installing the ESP boards package. For site menus and article titles, Adding ESP32/ESP8266 Boards to Arduino IDE is the clearest name for readers to recognize right away.
1. Download Arduino IDE
Download and install Arduino IDE 2.x from the official Arduino Software page. It supports Windows, macOS, and Linux. The older 1.8.x IDE still works too, but if you're starting fresh, IDE 2.x is the more comfortable choice.
Official Arduino IDE download page
2. Add the boards manager URL
Open Arduino IDE and go to File > Preferences, or on macOS, Arduino IDE > Settings. Enter the addresses below in the Additional boards manager URLs field. When using both, put one per line or separate them with a comma.
https://arduino.esp8266.com/stable/package_esp8266com_index.json
If you'll only use ESP32, add just the ESP32 address; if only ESP8266, add just that one. If you plan to work with both families, it's simplest to add both now.
3. Install the board package
Open Tools > Board > Boards Manager and search for esp32. Install the package that shows up as esp32 by Espressif Systems.
In the same Boards Manager, search for esp8266. Install the esp8266 by ESP8266 Community package.
4. Install libraries
The board package installs the compiler and board definitions, but sensor and communication features often need separate libraries. For example, if you're using a DHT22 temperature/humidity sensor, install the following libraries from Sketch > Include Library > Manage Libraries.
- DHT sensor library
- Adafruit Unified Sensor
- For MQTT: PubSubClient
- For working with JSON: ArduinoJson
5. Choose the board and port
After connecting the board over USB, pick the closest match to your actual board under Tools > Board. Start with NodeMCU 1.0 for a NodeMCU ESP8266, LOLIN(WEMOS) D1 R2 & mini for a Wemos D1 mini, and ESP32 Dev Module for a generic ESP32 DevKit. Then select the connected COM port or USB serial port under Tools > Port.
6. Confirm the compile
Open File > Examples > 01.Basics > Blink and compile it with the check button in the upper left. Done compiling appears once it finishes. To confirm the upload as well, press the arrow button to flash it onto the board.
| Compile succeeds | The board package and default settings are working correctly. |
| Port doesn't appear | Check whether the USB cable is a data cable, and whether the board needs a CH340/CP210x driver. |
| Upload fails | Some ESP32 boards require holding the BOOT button when the upload starts. |
| Library not found | Check the header file name in the error message and install it from Library Manager. |
Common sticking points
- ESP boards don't show up in the board list: check for a typo in the URL, your internet connection, and restart Arduino IDE.
- Multiple URLs won't save: use the button to the right of Additional URLs to enter them one line at a time.
- ESP8266 uploads are unstable: insufficient power, a long USB cable, or a faulty cable are common causes.
- ESP-01S upload: you must hold GPIO0 to GND while resetting to enter upload mode.
Next steps
Once you've gotten this far, you're ready to compile ESP32/ESP8266 example code. From here, you can move on to connecting a sensor like the DHT22, or to a build article that joins your router with a Wi-Fi example and sends values out over a web server or MQTT.
Why the known-good setup should be recorded
An Arduino IDE setup guide is weak if it ends with installing the program. In real builds, the important record is which board-package version, board name, serial port, and upload speed successfully worked. Without that baseline, the next upload failure becomes hard to separate into a driver issue, board-selection issue, or application-code issue.
ESP8266 and ESP32 boards can use different USB-serial chips, including CH340, CP210x, and FTDI. Two boards that both look like a D1 Mini can require different drivers on the computer. After the first successful upload, keep the board photo, port name, driver name, and board-manager version together.
Before starting a sensor project, keep short verification sketches such as Blink, Wi-Fi Scan, and I2C Scanner. If the main firmware fails but these known-good sketches still work, the board and development environment are alive, and the investigation can narrow to sensor wiring or application logic.