
Build Guide
ESPHome Setup and First ESP32 Sensor Device
ESPHome lets you build ESP32 and ESP8266 sensor devices with a configuration-first workflow. Instead of writing a long Arduino sketch, you describe the board, Wi-Fi, sensors, and integrations in YAML.
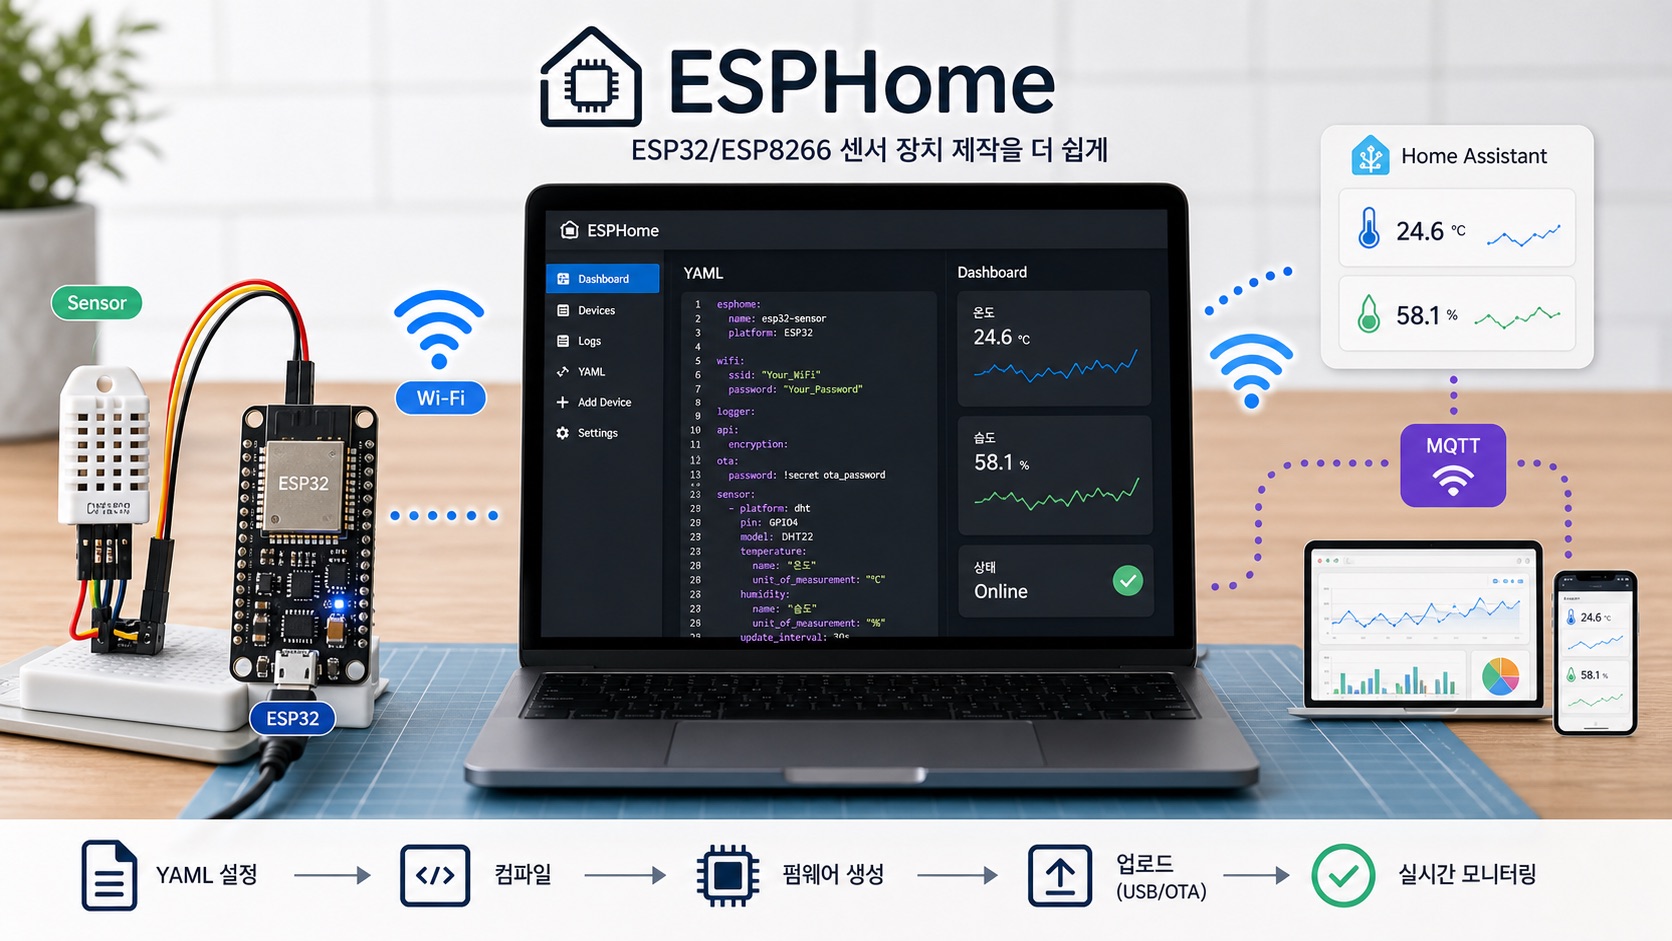
What ESPHome Is
ESPHome is useful when you need repeatable IoT devices such as temperature sensors, relay controllers, switches, and simple monitoring nodes. It generates firmware from configuration and integrates well with Home Assistant.
Arduino IDE
Best when you need custom logic, low-level behavior, or unusual protocols.
ESPHome
Best for common sensor, relay, API, OTA, and MQTT workflows.
Installation Options
- Home Assistant Add-on: the easiest path if you already use Home Assistant.
- ESPHome Dashboard: manage devices from a local web interface.
- Command Line: run builds from a terminal with commands such as
esphome run device.yaml. - ESPHome Web: useful for initial USB flashing from a browser.
Parts
- ESP32 or ESP8266 development board
- USB data cable
- Wi-Fi SSID and password
- A sensor such as DHT22 or BME280
- Chrome or Edge browser
- Optional: Home Assistant or MQTT broker
Create the First Device
- Open ESPHome Dashboard and choose New Device.
- Name it clearly, such as
room-climate-01. - Select a board close to your hardware, such as ESP32 Dev Module.
- Enter Wi-Fi settings.
- Use USB for the first upload. After that, OTA updates can be used on the same network.
DHT22 YAML Example
This example reads a DHT22 sensor on GPIO4. Change the board, pin, and Wi-Fi settings for your device.
esphome: name: room-climate-01 friendly_name: Room Climate 01esp32: board: esp32dev framework: type: arduinowifi: ssid: "YOUR_WIFI_NAME" password: "YOUR_WIFI_PASSWORD"logger:api:ota: platform: esphomesensor: - platform: dht pin: GPIO4 model: DHT22 temperature: name: "Room Temperature" humidity: name: "Room Humidity" update_interval: 30s
How to Check
- Logs: check Wi-Fi, sensor reads, and API connection state.
- Home Assistant: ESPHome devices can be discovered on the same network.
- MQTT: use MQTT Explorer to inspect topics and values.
- OTA: unplug USB, power the device normally, and test a wireless update.
Common Problems
- If the device is offline, check that the PC and device are on the same Wi-Fi network.
- If first upload fails, check the USB data cable and serial driver.
- If a sensor returns
nan, check power, ground, data pin, and pull-up resistor. - For field devices, plan Wi-Fi reconnects, power recovery, OTA credentials, and backup YAML files.
When ESPHome fits a field device
ESPHome is convenient because it can turn YAML into a working sensor device quickly, but it is not the best fit for every project. It is strong for Home Assistant-based home automation, repeated sensors such as temperature, humidity, light, and switches, and devices that benefit from OTA updates and easy log viewing. If a device must operate like a standalone product with its own web UI and complex local logic, Arduino or ESP-IDF code can be simpler.
For the first device, do not stop at confirming that the value appears in Home Assistant. Also check automatic recovery after a power restart, reconnection after Wi-Fi loss, and whether OTA failure can be recovered. Once a device is mounted in the field, recovering it through USB becomes inconvenient.
The operating rule should also be decided early. Measurement interval, filters, units, display name, and alert thresholds need to be consistent; otherwise the dashboard becomes messy later. ESPHome's strength is not only fast creation, but consistent management of many sensor nodes under the same rule set.