
iot remote update · ota updates · iot firmware
IoT Remote Update OTA Testing: From ESP8266 firmware.bin Generation to Web Server Upload
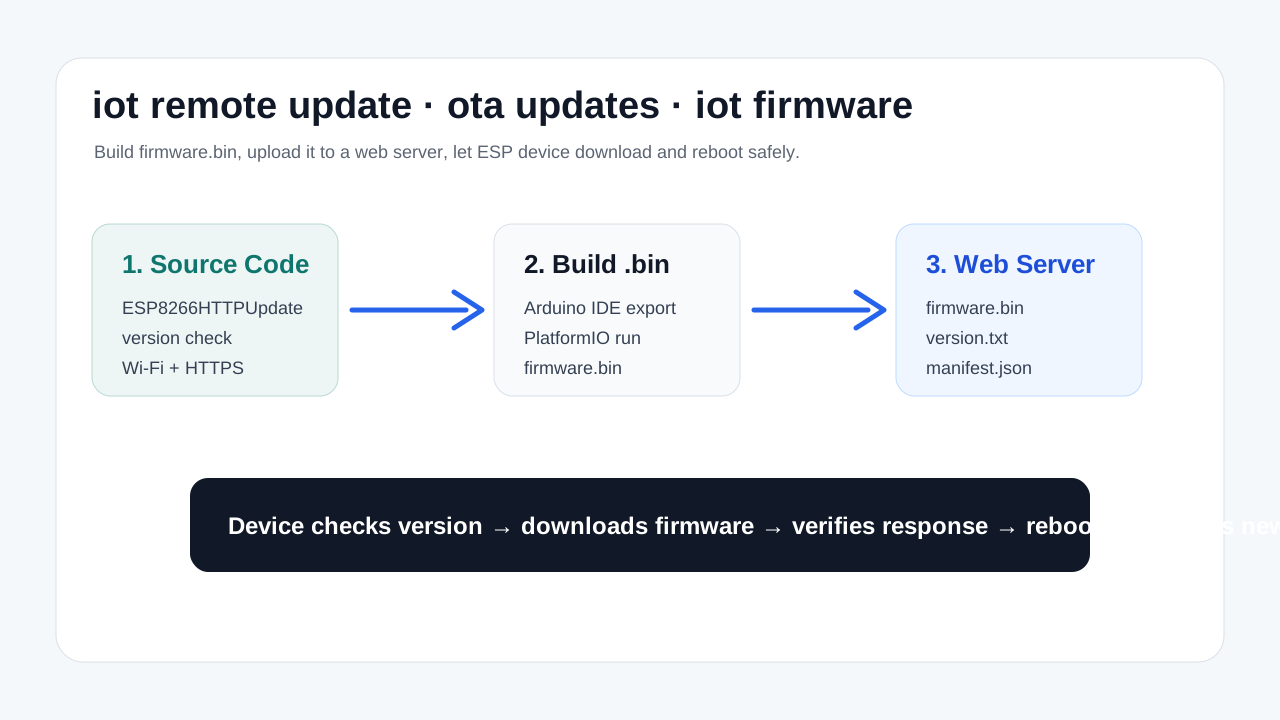
This is how to actually test remote update OTA. Instead of connecting the ESP8266 or ESP32 over USB every time, we build a flow where the device downloads a firmware.bin uploaded to a web server and updates itself.
1. What You'll Need
Board
ESP8266 NodeMCU, Wemos D1 mini, ESP-01, or an ESP32-family board. The first time, you need to upload OTA-capable firmware over USB.
Development Tools
Arduino IDE or PlatformIO. In Arduino IDE, use Export Compiled Binary; in PlatformIO, run pio run to produce the bin file.
Web Server
Apache, Nginx, PHP hosting, or a static file server that supports HTTPS. HTTP works for testing, but HTTPS is recommended for production.
Files to Upload
firmware.bin, version.txt, and optionally manifest.json. The device checks version.txt to decide whether to update.
2. Preparing the OTA Source Code
The code below targets the ESP8266. The core idea is to compare the current version against the server's version.txt, and if they differ, download firmware.bin and run the OTA update.
"tok-pre">#include <ESP8266WiFi.h>
"tok-pre">#include <ESP8266HTTPClient.h>
"tok-pre">#include <ESP8266httpUpdate.h>

"tok-key">const "tok-key">char* WIFI_SSID = "YOUR_WIFI";
"tok-key">const "tok-key">char* WIFI_PASS = "YOUR_PASSWORD";

"tok-key">const "tok-key">char* CURRENT_VERSION = "1.0.0";
"tok-key">const "tok-key">char* VERSION_URL = "https://example.com/iot/ota/version.txt";
"tok-key">const "tok-key">char* FIRMWARE_URL = "https://example.com/iot/ota/firmware.bin";

"tok-key">void "tok-fn">setup() {
  Serial."tok-fn">begin(115200);
  WiFi."tok-fn">mode(WIFI_STA);
  WiFi."tok-fn">begin(WIFI_SSID, WIFI_PASS);

  "tok-key">while (WiFi.status() != WL_CONNECTED) {
    "tok-fn">delay(500);
    Serial.print(".");
  }

  "tok-fn">checkOtaUpdate();
}

"tok-key">void "tok-fn">loop() {
  // Put your actual sensor readings or device logic here.
}

"tok-key">void "tok-fn">checkOtaUpdate() {
  WiFiClientSecure client;
  client.setInsecure(); // For testing only. In production, use certificate fingerprint or CA verification.

  HTTPClient http;
  http."tok-fn">begin(client, VERSION_URL);
  "tok-key">int code = http."tok-fn">GET();

  "tok-key">if (code != HTTP_CODE_OK) {
    Serial."tok-fn">printf("version check failed: %d\n", code);
    http."tok-fn">end();
    "tok-key">return;
  }

  "tok-key">String latest = http.getString();
  latest."tok-fn">trim();
  http."tok-fn">end();

  Serial."tok-fn">printf("current=%s latest=%s\n", CURRENT_VERSION, latest.c_str());

  "tok-key">if (latest == CURRENT_VERSION) {
    Serial."tok-fn">println("already latest");
    "tok-key">return;
  }

  ESPhttpUpdate.setLedPin(LED_BUILTIN, LOW);
  t_httpUpdate_return result = ESPhttpUpdate."tok-fn">update(client, FIRMWARE_URL);

  "tok-key">switch (result) {
    "tok-key">case HTTP_UPDATE_FAILED:
      Serial."tok-fn">printf("OTA failed: %s\n", ESPhttpUpdate.getLastErrorString().c_str());
      "tok-key">break;
    "tok-key">case HTTP_UPDATE_NO_UPDATES:
      Serial."tok-fn">println("no update");
      "tok-key">break;
    "tok-key">case HTTP_UPDATE_OK:
      Serial."tok-fn">println("updated, rebooting");
      "tok-key">break;
  }
}
On ESP32, the header changes to something like #include <HTTPUpdate.h>, and the update call differs slightly depending on the core version you're using. For search visibility, it helps to include ESP8266 OTA, ESP32 OTA, and iot firmware together in the title.
3. How to Generate the firmware.bin File
Generating in Arduino IDE
- Select the board and port. For example: NodeMCU 1.0 or LOLIN(WEMOS) D1 mini.
- In the OTA code, change
CURRENT_VERSIONto the new version. For example:1.0.1. - From the menu, run Sketch → Export Compiled Binary.
- Find the
.binfile generated in the sketch folder or the build folder. - Rename the file to
firmware.binso it's easy to reference on the web server.
Generating in PlatformIO
pio run
# Example output location
.pio/build/nodemcuv2/firmware.bin
4. Files to Upload to the Web Server
The simplest structure looks like this. The device reads version.txt first, and if the version differs, it downloads firmware.bin.
/var/www/html/iot/ota/
  firmware.bin
  version.txt
  manifest.json
version.txt contains just a single line.
1.0.1
To manage multiple device groups, keep a manifest.json that tracks the model name, version, and file URL together.
{
  "device": "esp8266-test-node",
  "version": "1.0.1",
  "firmware": "https://example.com/iot/ota/firmware.bin",
  "notes": "OTA update test build"
}
5. How to Test OTA
- The first time, upload firmware that includes OTA support over USB.
- Upload
version.txtandfirmware.binto the web server. - Check in a browser that
https://example.com/iot/ota/version.txtandfirmware.binboth open correctly. - Reboot the ESP8266.
- Check the serial monitor to confirm the current version is compared against the server version.
- If the update succeeds, the board reboots automatically.
- On the next boot, if
CURRENT_VERSIONmatches the server version, it should correctly skip the update.
6. Troubleshooting Checklist
| Symptom | What to Check |
|---|---|
| version check failed | Typos in the URL, HTTPS certificate, firewall, web server permissions |
| OTA failed: not enough space | Flash size and partitioning, insufficient ESP8266 OTA space |
| Repeated reboots | Wi-Fi settings in the new firmware, unstable power, exceptions being thrown |
| bin downloads fine but the update fails | Mismatched board type, incorrect build environment, corrupted file |
7. Add These Before Going to Production
A production iot remote update shouldn't stop at simply downloading a file. At minimum you need per-device auth keys, version rollback, update logs, failure-rate tracking, battery-level conditions, and power stability checks. Field devices in particular may need to be physically retrieved if an OTA update fails, so validate thoroughly on small test devices before rolling it out.