
Home IoT Hub Series · 01
Home IoT Hub — Give Your Home a Brain with a Single ESP8266
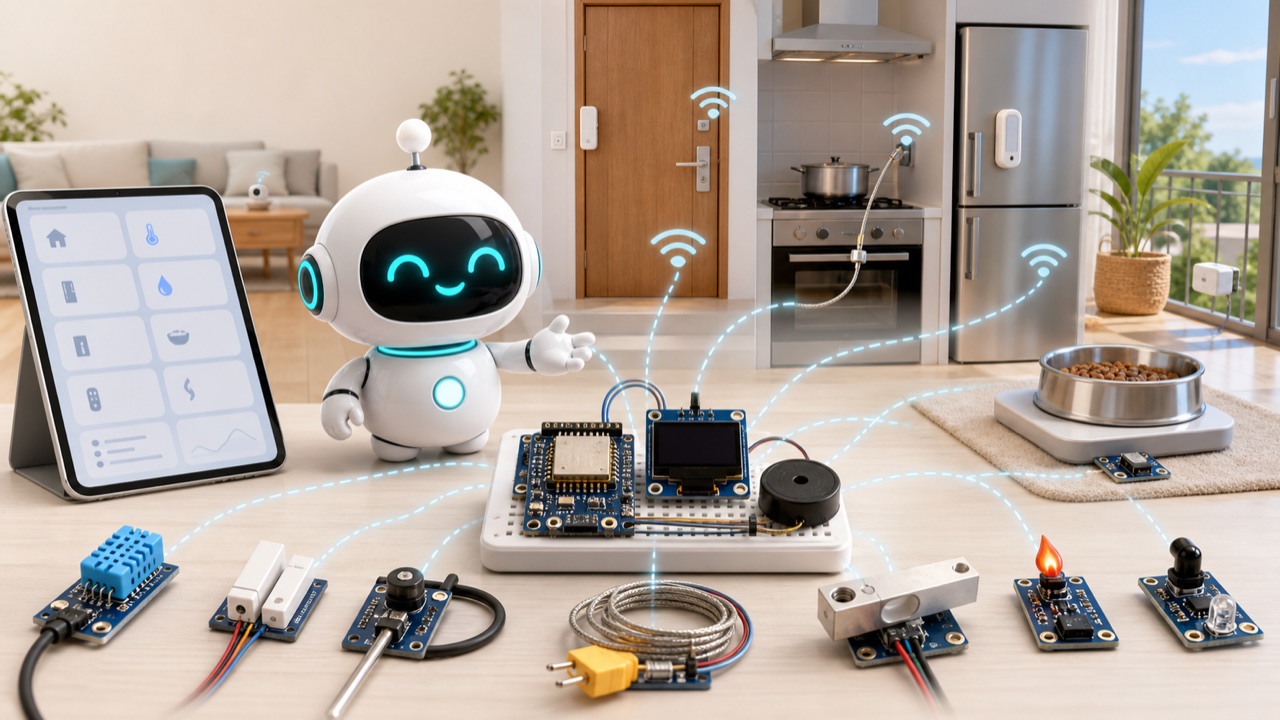
Why I started
Living-room temperature on a phone app, the front-door sensor wired to its own separate buzzer, and to know whether the gas stove was left on I had to walk into the kitchen and look. All the information in my home was scattered.
"Can't I just gather all of this onto one small screen?"
So I started. A little brain: one OLED on an ESP8266, with 20 memory slots carved out to push every sensor value into. Its name is the Home IoT Hub, and I'll publish it as a series here on iothub.co.kr.
Concept: brain first, sensors later
Most IoT projects start by buying sensors. Buy a DHT22, buy a PIR, buy a relay… and then the sensors just pile up, unused, because you don't know where to connect them.
We go the other way.
1. First, build the "brain." (ESP8266 + OLED)
2. The brain runs happily on its own, even with no sensors. (web server + OLED scroll)
3. Add one sensor node a day, plugging it into the brain.
The advantage of this approach is that you have something that works from day one. That first evening, the OLED is already glowing. It's still full of -- placeholders, but filling in those blanks is surprisingly satisfying.
Parts and cost for the body (one brain set)
| Part | Price (approx. USD) | Notes |
|---|---|---|
| ESP8266 (NodeMCU / Wemos D1 Mini) | ~$1.70 | AliExpress price |
| SSD1306 128×64 OLED (I2C) | ~$1.20 | 0.96" white |
| Piezo buzzer | ~$0.20 | 3–5V active type |
| Jumper wires ×10 | ~$0.35 | female-female |
| Breadboard | ~$1.00 | optional |
| Micro USB cable | ~$0.70 | power + upload |
| Body total | about ~$5.00 |
What information we'll collect
I've pre-assigned 20 slots. This is for a typical home; change any of it to suit your situation.
| # | Measurement | Example value | Method | Sensor price (USD) |
|---|---|---|---|---|
| 1 | Living-room temp | 24.5℃ | DHT22 | ~$1.40 |
| 2 | Living-room humidity | 58% | (same as #1) | — |
| 3 | Outdoor temp | 18.0℃ | DHT22 | ~$1.40 |
| 4 | Air-con state | OFF | IR transmit feedback | VS1838B+LED ~~$0.40 |
| 5 | Boiler running | OFF | DS18B20 (pipe) | ~$1.00 |
| 6 | Gas stove in use | 0 | K-type thermocouple | ~$2.00 |
| 7 | Gas leak ⚠ | 0 | MQ-5 gas sensor | ~$1.00 |
| 8 | Fire detected ⚠ | 0 | Flame sensor | ~$0.70 |
| 9 | Front door open ⚠ | 0 | MC-38 reed switch | ~$0.55 |
| 10 | Entrance lock | 1 | Door-lock state sensor | ~$1.40 |
| 11 | Living-room light | OFF | Photoresistor or relay | ~$1.00 |
| 12 | Fridge temp | 3.5℃ | DS18B20 waterproof | ~$1.40 |
| 13 | Indoor CO2 | 620ppm | MH-Z19B | ~$13.50 |
| 14 | Fine dust PM2.5 | 35㎍/m³ | PMS5003 | ~$10 |
| 15 | Power usage | 320W | ACS712 | ~$1.70 |
| 16 | Water usage | 0L | Flow sensor YF-S201 | ~$2.00 |
| 17 | Hot-water temp | 42℃ | DS18B20 (pipe) | ~$1.00 |
| 18 | Rain detection | 0 | Raindrop sensor | ~$0.70 |
| 19 | Bathroom humidity | 62% | DHT22 | ~$1.40 |
| 20 | Dog food bowl ⚠ | 120g | HX711 load cell | ~$2.00 |
The ⚠ marks are alert targets. When gas leaks, a fire starts, or a door opens, the OLED flashes and the buzzer sounds. If the food bowl drops below 50g, it warns "refill the food."
Wi-Fi structure: the brain becomes the router
Understand this and it becomes clear why each sensor needs its own ESP8266.
home router (192.168.0.1)
    │
    ├── brain ESP8266 (192.168.0.50)
    │       │
    │       │  AP mode: IoT_Hub_Net (password-protected private Wi-Fi)
    │       │  → sensor nodes connect to this network
    │       │
    │       ├── sensor node #1  ESP8266 + DHT22 (living-room temp/humidity)
    │       ├── sensor node #2  ESP8266 + reed switch (front door)
    │       ├── sensor node #3  ESP8266 + thermocouple (gas stove)
    │       ├── ...
    │       └── sensor node #19 ESP8266 + HX711 (dog food bowl)
    │
    └── my phone/PC → web dashboard at the brain's IP
Brain ESP8266:
- Joins the home router in STA mode (provides internet + dashboard)
- At the same time creates its own Wi-Fi
IoT_Hub_Netin Soft AP mode - Runs a 20-slot HTTP server
Sensor node ESP8266 (×19):
- Joins the brain's AP
IoT_Hub_Netin STA mode - Measures the sensor value → sends it to the brain via HTTP GET
/set?noX=value - Connects automatically as soon as it has power
The advantage of this structure is that sensor nodes don't depend on the home router. As long as the brain is connected to the router, the sensors talk over the brain's own Wi-Fi. No load on the router, and adding a sensor node is easy.
How alerts work
No separate warning light needed. Even a 0.96" OLED is quite noticeable when the whole screen inverts white↔black. Add a single piezo buzzer and you have a dual "see it and hear it" alert. The buzzer costs ~$0.20.
ESP8266 models: pick by size for the job
ESP8266 isn't a single thing. They all use the same chip, but the board size and pin count differ. Pick the right one for the job and you save both money and space. The GPIO numbers are the same on any board, so as long as your code uses labels like D2 or D5, swapping boards just works.
| Model | Size | GPIO | Price (USD) | Where to use |
|---|---|---|---|---|
| NodeMCU v3 | Large (58×31mm) | 11 | ~$1.70 | The brain body (OLED + buzzer + spare pins) |
| Wemos D1 Mini | Small (34×26mm) | 9 | ~$1.40 | General sensor nodes (DHT22, DS18B20, etc.) |
| ESP-01S | Tiny (25×15mm) | 2 (GPIO0, 2) | ~$1.00 | Simple sensors (reed switch, PIR, raindrop — anything needing just one pin). ⚠ Needs a separate USB upload adapter (FTDI, ~$1.40) |
How to choose:
- The brain needs an OLED (I2C, 2 pins) + buzzer (1 pin) + maybe a nearby sensor wired directly, so the pin-rich NodeMCU is the answer.
- A sensor node is almost fully covered by a Wemos D1 Mini. Even non-I2C sensors like the DHT22 need just one data pin.
- For spots that truly need only a 1-bit signal, like door-open detection, an ESP-01S is enough. It's tiny enough to tuck into a door gap. But unlike the NodeMCU or D1 Mini, it has no USB port, so you can't plug it straight into a PC. To upload code you need one FTDI USB-to-Serial adapter (~$1.40). With a single adapter you can flash many ESP-01S boards in turn, so the burden is small.
- Whatever model you use, the GPIO numbers are the same. e.g.
D2= GPIO4,D5= GPIO14 on both NodeMCU and D1 Mini. Copy-paste the code and you're done.
So what's the verdict? ESP-01S? FTDI? If it's getting complicated, don't think about it. Just buy twenty D1 Minis. One ~$1.40 board works as both the brain and a sensor node. Better than losing hair to save a few thousand won. The ESP-01S can wait for "when you actually need something really small." Alright, drop the headache and move on.
Power: standardize everything on USB
Every ESP8266 board takes 5V through a Micro USB port. So an old phone charger + a Micro USB cable is all you need. That's exactly why an ordinary person can do this. No soldering, no voltage math — you just plug it in.
| Location | Power method | Notes |
|---|---|---|
| Brain body | 5V charger + Micro USB | Must stay on, so wire directly to a wall outlet |
| Sensors near an outlet (living room, kitchen, rooms) | 5V charger + Micro USB | Reuse an old charger lying around the house |
| Spots far from an outlet (entrance, door gaps, balcony) | Power bank or 18650 battery | With Deep Sleep + wake every 5 min, one power bank lasts days to weeks |
| ESP-01S sensor node | 3.3V regulator or fed from the FTDI | With only 2 pins the power pin is shared, but with a D1 Mini you don't have to worry |
Practical tips:
- The D1 Mini has a Micro USB port. Plug in an old 5V 1A charger from a drawer and you're done.
- Short on chargers? Buy one 5V multi-USB charging hub (~$3.40) and cluster 4–5 sensors in one spot.
- Awkward outlet positions (above a door, a window sill) are solved with a 2m long Micro USB cable (~$1.00).
- Only the spots power truly can't reach go on battery. Most homes have outlets closer than you'd think.
IR control works too (later)
Add an infrared transmit/receive module to the ESP8266 and you go beyond monitoring to control: turn the air conditioner on/off, the TV on/off, adjust fan speed. You learn the existing remote's signal and fire it off via an HTTP request. That's covered separately later on.
Expansion roadmap
The real build is one a day. If sensor parts are piling up at home, do two at a time on the weekend.
Day 1  → Assemble the IoT Hub body (brain ESP8266 + OLED + buzzer)
Day 2  → Living-room DHT22 + a sensor ESP8266 (temp/humidity)
Day 3  → Entrance reed switch + a sensor ESP8266 (door open)
Day 4  → Gas-stove thermocouple + a sensor ESP8266
Day 5  → Fridge DS18B20 + a sensor ESP8266
Day 6  → Dog food bowl HX711 + a sensor ESP8266
Day 7  → Balcony DHT22 + a sensor ESP8266
Day 8  → Flame sensor + a sensor ESP8266
...
~2 weeks later → 20 slots + 19 sensor nodes: your home's control tower is complete
At first the OLED is full of --. There's a real joy in watching those blanks fill with actual values, day by day.
What's next
This post is the first, the overview, of the Home IoT Hub series.
The next post is "Building the brain" — putting a web server on the ESP8266 and building the OLED 20-channel scrolling screen, with code.
Every post will follow this format:
And I'll post one sensor a day: the living-room DHT22, the entrance reed switch, the dog food-bowl load cell… follow along one at a time and before long your home will start talking to you too.
Today's task: one ESP8266, one OLED, one buzzer. With just these three you can build the brain. Ready? On to the next post.
This article is part of the 20-channel Home IoT system built from the Part 2 central brain server and the distributed edge nodes in Parts 3-19. Use this map to check the slot and sensor flow across the series.
[Part 1] Home IoT Hub overview[Part 2] Central brain server · slots 1-20[Part 3] Stop guessing room comfort · slots 1/2[Part 4] Did I close the door? · slots 9[Part 5] Is the fridge really cooling? · slots 12[Part 6] Should I open the window? · slots 3[Part 7] Stop bathroom mold before it starts · slots 19[Part 8] Is the boiler actually running? · slots 5/17[Part 9] Did I leave the gas stove on? · slots 6[Part 10] Get warned before gas smell becomes obvious · slots 7[Part 11] Catch flame signs while away from home · slots 8[Part 12] Is bad air making you foggy? · slots 13/14[Part 13] Why is the power bill so high? · slots 15[Part 14] Is water leaking, and how much are we using? · slots 16[Part 15] Do not leave windows open in the rain · slots 18[Part 16] Are the lights off and the door locked? · slots 11/10[Part 17] Control the air conditioner from the IoT hub · slots 4[Part 18] Is the dog bowl empty? · slots 20[Part 19] Cool the room only when someone is there · slots 1/4[Part 20] The house finally fits on one screen · slots all